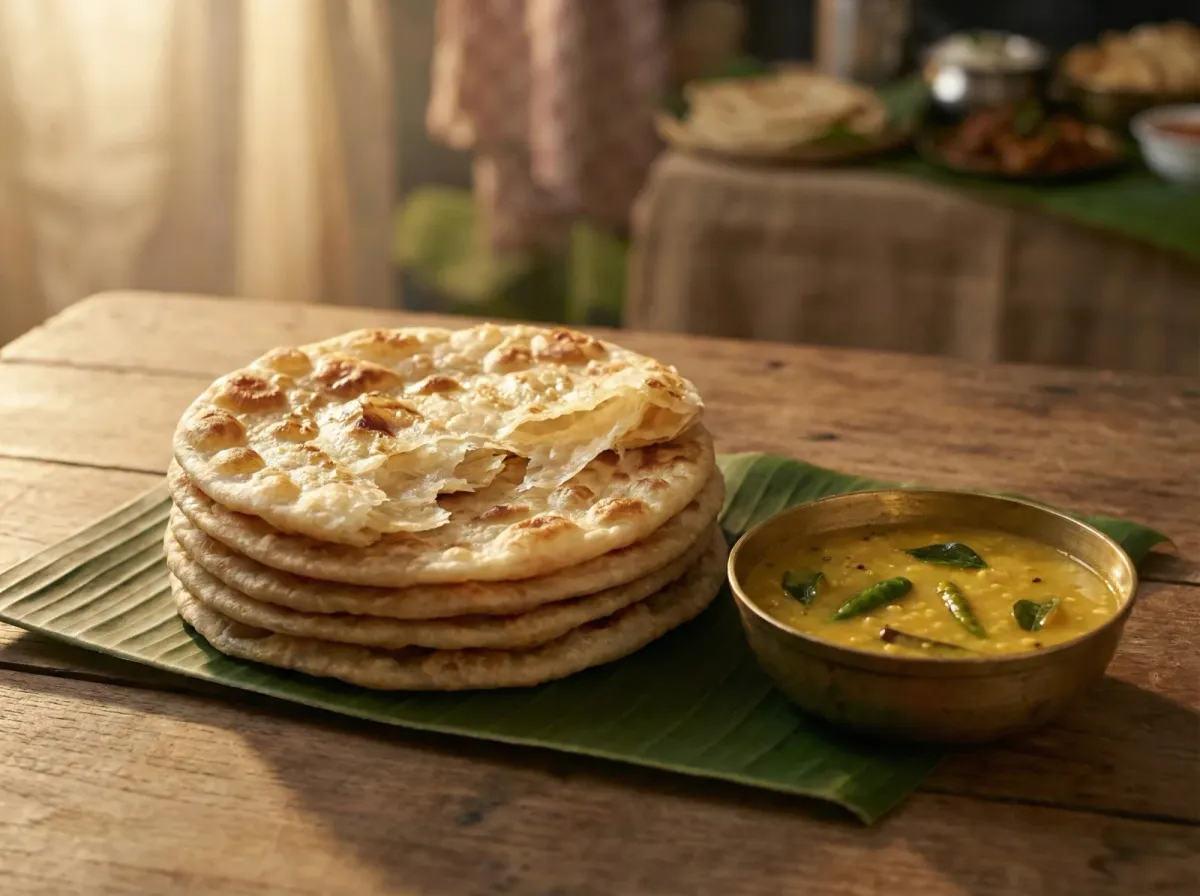
Godamba Roti: Sri Lanka's Paper-Thin Stretchy Flatbread
An oil-enriched dough stretched translucent-thin and cooked on a hot griddle until blistered and flaky — the bread that becomes kottu roti, or gets eaten on its own with a curry.
Prep
30 min
Cook
20 min
Total
50 min
Serves
8
Ingredients
Dough
- 300g plain flour (not bread flour — you want moderate gluten)
- 1/2 tsp salt
- 1 tsp sugar
- 1 tbsp coconut oil or vegetable oil (for the dough)
- 1 egg, beaten (optional — makes the dough richer and easier to stretch)
- 180ml warm water (reduce to 150ml if using egg)
For stretching and cooking
- 100ml coconut oil or vegetable oil (for coating the dough balls)
- Extra oil or ghee for the griddle
Method
- 1
Combine flour, salt, and sugar in a large bowl. Add the oil and the beaten egg (if using), then add warm water gradually. Mix and knead for 10–12 minutes until the dough is smooth, soft, and elastic — it should spring back when you press it with a finger. This dough is softer than chapati dough. Slightly sticky is fine.
- 2
Divide the dough into 8 equal balls (about 60g each). Roll each ball smooth between your palms.
- 3
Pour the 100ml oil into a shallow tray or wide bowl. Place all the dough balls into the oil, turning to coat them completely. The oil prevents a skin forming and relaxes the gluten. Cover with cling film.
- 4
Rest for a minimum of 2 hours at room temperature. Overnight in the fridge is even better — the extended rest makes the dough far easier to stretch. If refrigerated, bring to room temperature for 30 minutes before stretching.
- 5
To stretch: oil your work surface generously. Take one ball and press it flat with your palm. Now use your fingertips and the backs of your hands to stretch the dough outward from the centre, working in a circle. Pick it up and let gravity help — drape it over your knuckles and gently pull outward, rotating as you go.
- 6
The dough should stretch to roughly 30–35cm diameter. It should be nearly translucent — you should be able to see your hand or the surface beneath it through the dough. Small tears are fine. If it resists and springs back, rest it for 5 minutes and try again.
- 7
Once stretched thin, fold the dough: fold the left third over the centre, then the right third over that (like a letter). Then fold the top third down and the bottom third up, forming a rough square packet about 12–14cm across. This creates the flaky layers.
- 8
Heat a flat tawa or heavy frying pan over medium-high heat. Add a thin film of oil or ghee.
- 9
Place one folded roti on the hot surface. Cook for 40–60 seconds until the bottom is golden and blistered. Flip and cook the other side for another 40–60 seconds. Press gently with a spatula — you'll see the layers start to separate and steam will escape from the edges.
- 10
Remove from the pan and immediately scrunch the roti between your hands — clap it gently a few times. This separates the internal layers and gives it that characteristic flaky, shredded texture. Stack and cover with a cloth to keep warm while you cook the rest.
The Bread Behind the Noise
If you’ve made our kottu roti, you already know what godamba roti becomes when it’s torn up and chopped on a hot griddle with egg and vegetables. But before it becomes kottu, godamba roti is a thing worth eating on its own — a layered, flaky flatbread with a slight chew, blistered from the griddle, pulled apart at the table and dipped into curry.
It is Sri Lanka’s answer to Malaysian roti canai and South Indian parotta. They’re close cousins — all descend from the same tradition of oil-laminated, stretched flatbreads — but godamba roti has its own character: slightly thinner, slightly less rich, and designed as much for tearing and cooking into kottu as for eating straight off the tawa.
Why the Rest Matters More Than the Knead
You can knead this dough in 10 minutes. The rest takes 2 hours minimum. This feels disproportionate, but it’s the rest that makes the recipe work.
During the rest, two things happen. First, the gluten relaxes completely. Fresh dough fights you when you try to stretch it — it springs back, tears, refuses to go thin. Rested dough surrenders. It stretches willingly to translucent thinness with no resistance.
Second, the oil coating each ball gradually saturates the surface, creating a barrier between the layers when you fold the stretched dough. This is what produces the flaky, laminated structure — the same principle as puff pastry, but achieved through stretching and folding rather than rolling and turning butter.
Overnight in the fridge produces noticeably better results. The cold slows the gluten development further and the oil has more time to work into the dough. If you’re planning to make kottu, make the dough the night before.
The Stretching Technique
This is the part that intimidates people, and the part that gets easier every time you do it.
The method is the same one used for roti canai, Turkish yufka, and strudel dough: you drape the dough over the backs of your hands (not your fingertips — the backs, with your fists loosely closed) and gently pull outward, rotating the dough as you go. Gravity does most of the work. The dough stretches under its own weight.
The goal is translucency. You should be able to read a newspaper through the dough, or at least see your hand clearly beneath it. The edges will be slightly thicker — that’s fine. Small holes and tears don’t matter — they’ll be hidden inside the folds.
If the dough keeps springing back or tearing early, it hasn’t rested enough. Give it another 20–30 minutes under oil.
The Fold
The folding pattern creates layers. Each fold traps a thin film of oil between sheets of dough. When the roti hits the hot griddle, steam builds between these layers, puffing them apart slightly and creating the flaky interior.
The letter fold (thirds one way, then thirds the other way) gives you roughly 9 layers — enough for flakiness without making the roti too thick. Some cooks fold into a spiral instead, rolling the stretched dough into a long rope and then coiling it into a disc. This produces more layers but a denser, chewier result. Both are valid.
The Scrunch
Don’t skip this. The moment the roti comes off the griddle, you clap and scrunch it between your hands. This mechanical action separates the internal layers, releasing trapped steam and creating the shaggy, shredded texture that defines a good godamba roti.
If you leave it flat, the layers stick together as they cool and you lose the flakiness. The scrunch takes two seconds and makes the difference between a flat disc and a properly layered bread.
What to Eat It With
Godamba roti is traditionally served with:
- Dhal curry — a thin, turmeric-yellow coconut milk lentil curry. This is the default pairing.
- Chicken or beef curry — the roti torn into pieces and used to scoop the meat and sauce. A Sri Lankan fish curry with coconut milk is the classic pairing.
- Pol sambol — a rough coconut relish with chilli, onion, and lime. The contrast between the mild, flaky bread and the sharp, hot sambol is the whole point.
- Nothing at all — straight off the griddle, eaten standing in the kitchen, burning your fingers slightly. This is the cook’s privilege.
Or tear them up and make kottu. That works too.